Setting up a term base and using TBs in memoQ
Purpose/goal:
- How to create a new term base in memoQ if no term base is available yet.
- Entering new terms into the TB
Who/users:
- Translators/proofreaders, project managers
-
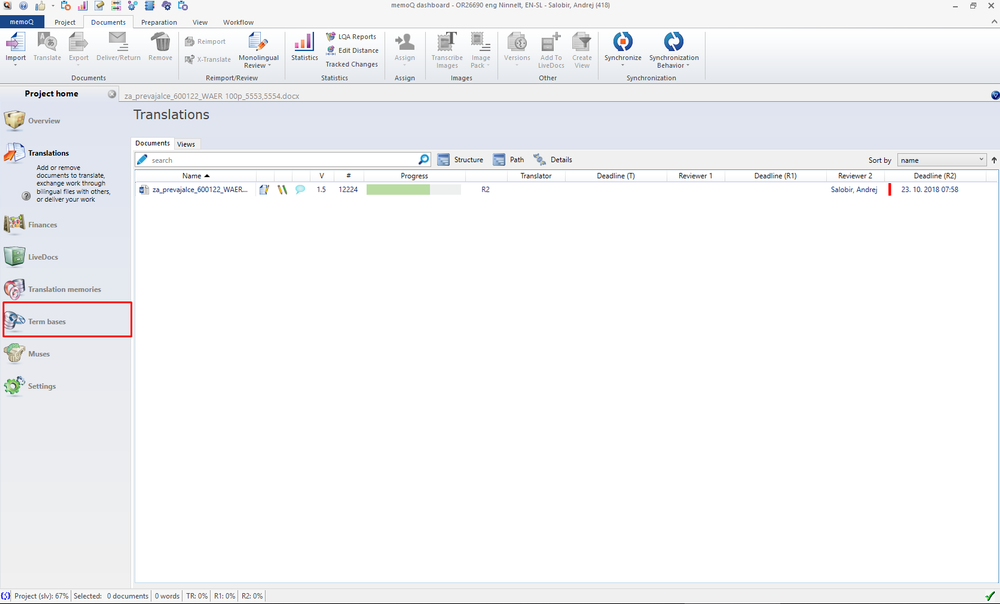
1Open the TB settings in memoQOpen the project you are working on in memoQ. In the dashboard, go to the option Term bases on the left.
-
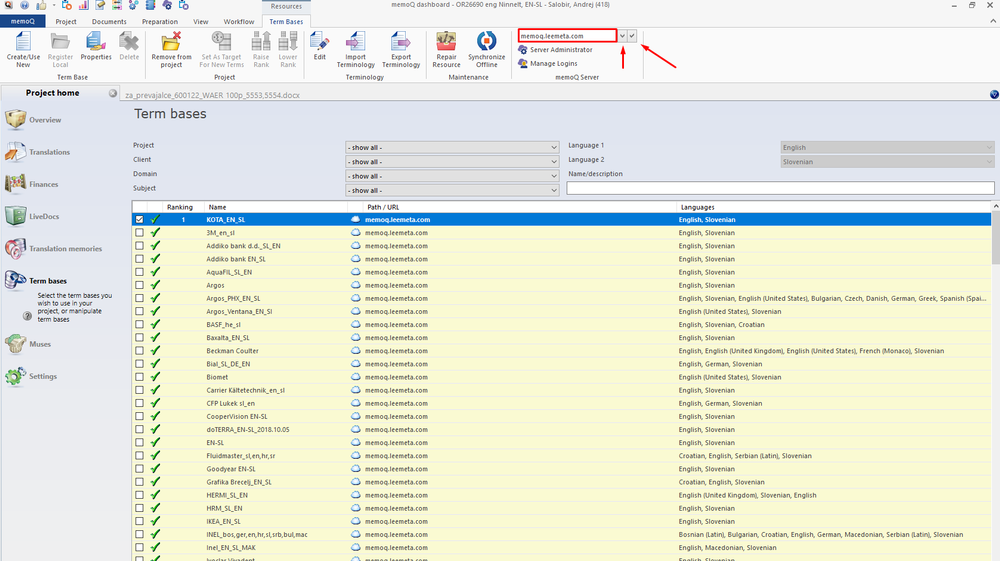
2Open the remote/server TBs and check if the TB for the project/client is already attached or availableIn the upper right section, select that you want access to server/remote TBs since memoQ defaults to My Computer. Therefore click the small arrow to the right to open the drop-down list, select our server memoq.leemeta.com and and click the tick to select the server. When the term bases are displayed below, search for the desired TB for the appurtenant client and language pair. If there is no TB yet, it will have to be created, otherwise just mark the check window to the left of the name and proceed with adding terms to the TB.
-
3Create or add to the TB
-
4Create a new TBClick Create/Use New in the upper left part. It opens a new window for creating term bases. Make sure that Remote is selected with the name of the server so the TB is created in our server. Otherwise it will be created locally in your computer which is also useful if you have no server access. Also enter the name which should be entered according to the following convention: Client name (including the ID number in brackets). The client name should be the full name as shown limeX or in the field below to the right, including the brackets and the number. Also enter the client name in the window Client below if it is not populated yet. You can also check on the right on the list of the right languages are selected, however memoQ usually adds the project languages automatically.
There is only one TB per client with all the languages, not for every language pair separately.
-
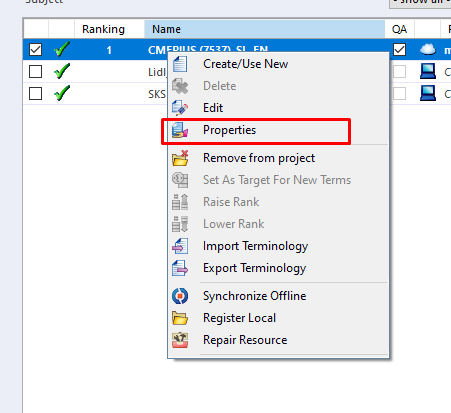
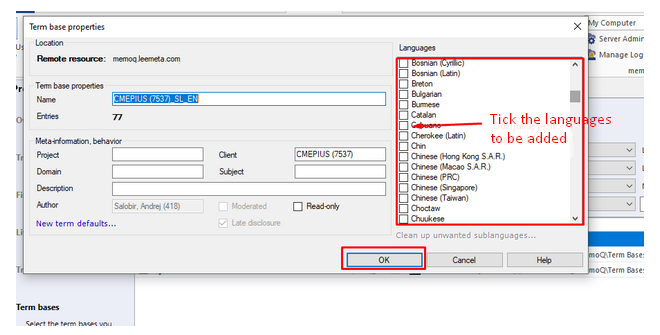
5Add a language to the existing TBIf the TB for the client already exists, however without the desired languages, they need to be added to the TB. Mark the TB/add the TB to the project and open the menu with the right click on the TB name to select Properties (or click Properties in the upper left section).
-
6Tick the languages you want to addWhen the window for adding languages opens, tick the language(s) you want to add and click OK.
-
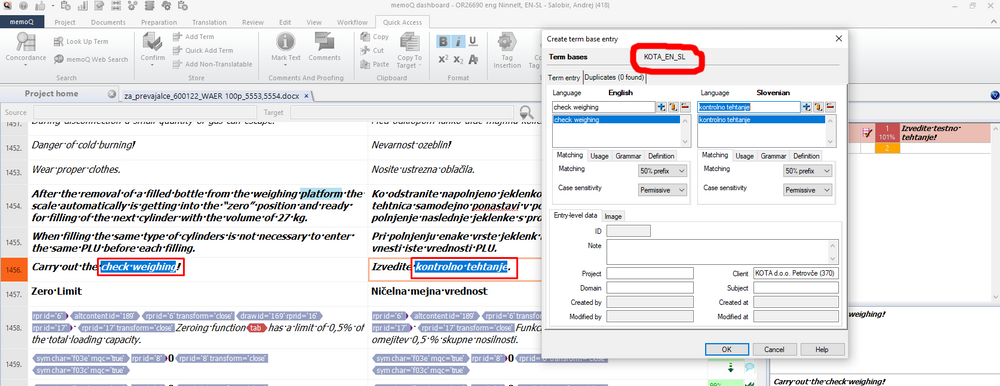
7Create a new TB entryWhen you decide during the translation/proofreading that certain terms should be added to the TB, just highlight them in the source and target segments and press CTRL + E. You can also go to the Translation tab and click Add term. The window for adding terms opens. Make sure the right term base is selected at the top of this window (if there are several term bases attached to the project, in which case there is a drop-down list for the selection of the desired TB).
-
8Edit the entry before saving itIf the languages are marked with strong flexations (many forms of the same word 0 such as Slovenian), the entries need to be edited properly so memoQ will recognize all the forms. We use two characters for that: | (AltGr + W) and *.
The | character is used to separate the root of the word (that never changes) from the changeable parts (suffixes). Be careful as to where exactly the | character should be placed.
The * character is used as a wildcard for suffixes when the word you are entering is also the root at the same time (such a word is sistem, to which we only add suffuxes during flexation as the "sistem" part never changes). The * character is added at the end of such words since the root and suffix cannot be separated with a |. In the example below, the | is placed behind "kontroln" and "tehtanj" since those are the roots of the words that never change.
Because the entry was modified (with | or * added and THE TERM CHANGED INTO NOMINATIVE SINGULAR, press the orange vertical line next to the term meaning that the entry has been edited and the changes must be accepted.
The + button means that we want to add another term (meaning several alternative options are added to the source) whereas - means that we want to delete the term.
At the bottom, you can also set the term as case permissive or not permissive (meaning that it is sensitive to capitalization). The default option is Permissive as the best one, however make the entries in non-capitalized letters. If, however, the terms require capital letters, enter them with capital letters and select No.
Once the entry is edited and ready, click OK below.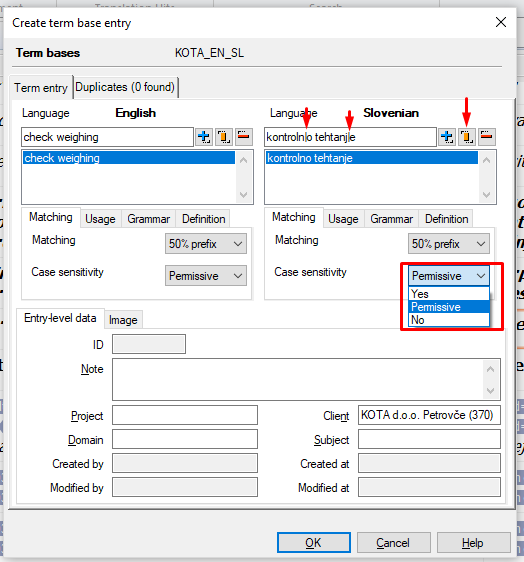
-
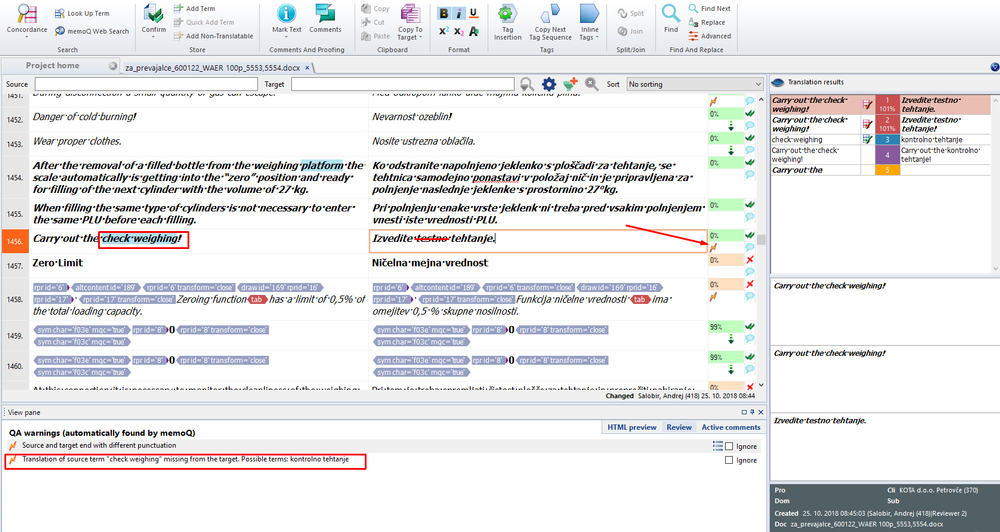
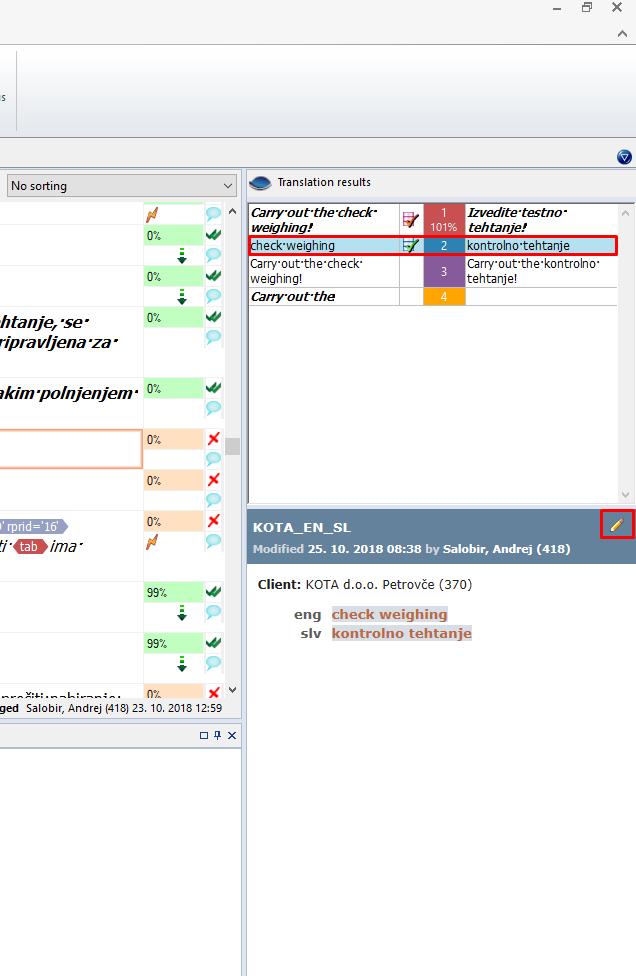
9Usage during the translation/proofreadingWhen working, the TB results are shown in blue among the translation results on the right. You can enter the the same way as TM hits (double click on the number of CTRL + entry number) and of course adapt them to the context. Also in the translation editor, the relevant terms are highlighted in blue so it is obvious right away that the source contains a term from the TB. If you click on the TB result on the right, you will see more information in the window below along with a pen symbol that opens the term editor (where you can edit the term in line with the steps above).
-
10Term not used warningIf you fail to use the proper term, a warning (lightning symbol) will appear upon confirming the segment along with the text in the Review window below that the term base term was not used. Also the QA step warns about such errors (see Performing a QA in memoQ).
