How to use Postage Machine
-
1Parts of the Postage Machine
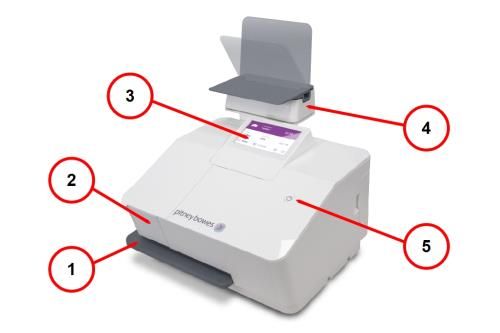
Item Description 1 Printer tray 2 Ink access cover 3 Touchscreen display 4 Scale (may be positioned left, right, or behind the device on the optional stand) 5 Power button and indicator lamp -
2turn on postage machinePress power button (5)
-
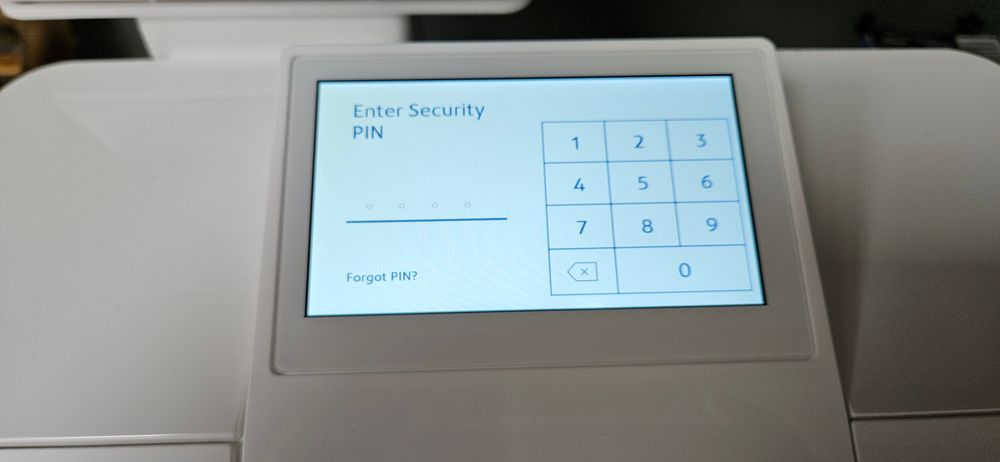
3Enter security codecode is 5742
-
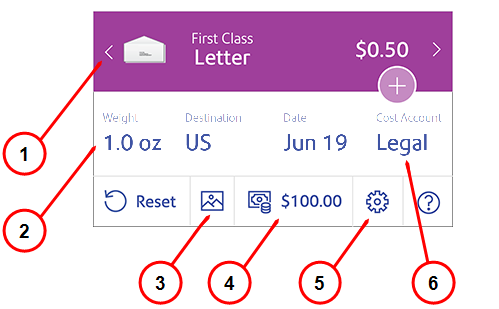
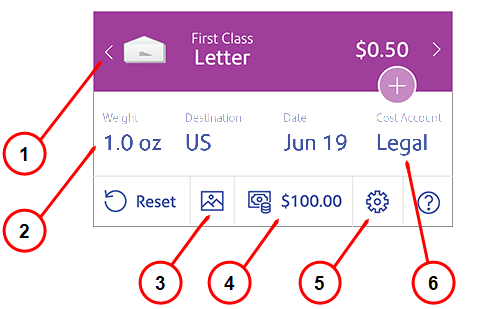
4Home Screen Information
- Mail type
- Weight received from the scale. Tap here to enter weight manually.
- Graphics. Tap here to add an image when you print postage.
- Postage balance. Tap here to refill postage.
- Settings
- Cost Account (if enabled) - WE DO NOT USE THIS
-
5Mailing Sizes
Size standards for First-Class Mail
- Letter:
- Minimum: 3.5" x 5"
- Maximum: 6.125" x 11.5"
- Large envelope:
- Minimum 6.125" x 11.5"
- Maximum 12" x 15"
- Postcard:
- Minimum 3.5" x 5"
- Maximum 4.25" x 6"
- Letter:
-
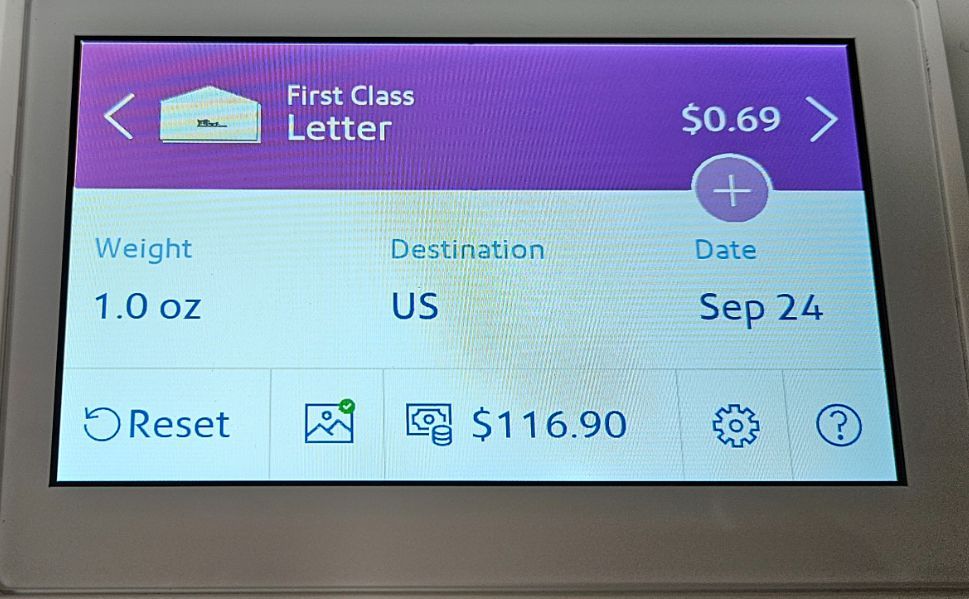
6Select Postage TypePostage type defaults to First Class Letter. However you can change the type of postage depending on what you are mailing. Press on first Class Letter and scroll to select postcard.
-
7Print Envelope or Postcard
To send mailpieces by Special Delivery or Signed For classes, sign into PitneyShip to print your postage.
- Place your envelope on the scale or enter the weight manually.
- Insert the letter into the device, pushing in all the way to the back and right. The device will clamp the letter and print postage. The power button will flash while the device is printing.
- When the device finishes printing, remove the letter. Do not pull the letter out of the machine while the power button is flashing.
-
8Lock Machine after useSelect Settings (Gear)
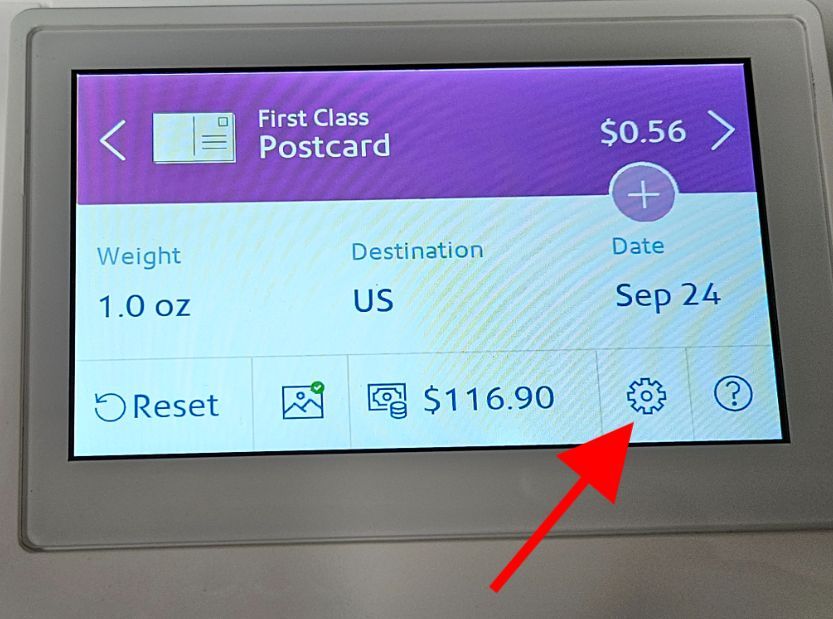
Select Lock/Sleep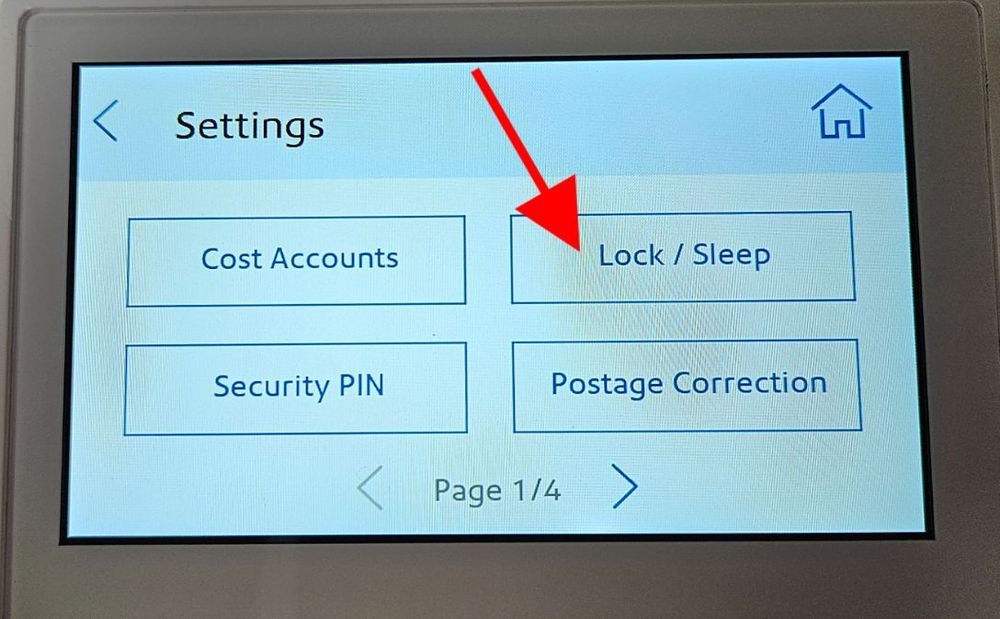
-
9Using a GraphicOur postage meter has a CHPC graphic currently installed. You can use that graphic or you can use the happy birthday graphic that is also installed.
- Tap the Graphics icon (3) on the Home screen.
- Use the arrows to scroll through the graphics.
- Tap the graphic you wish to use.
- Tap Apply.
- Tap Confirm.
- Place the envelope or tape sheet on the feed deck to print.
To remove a graphic:
- Tap the Graphics icon on the Home screen.
- Use the arrows to scroll through the graphics until you reach No Graphic.
- Tap No graphic.
- Tap Apply.
- Tap Confirm.
- Place the envelope or tape sheet on the feed deck to print.
Did this answer your question?
If you still have a question, we’re here to help. Contact us
