Calendar Settings: Campuses
help.myamplify.io/hc/en-us/articles/12337695271...
If your Church has multiple Campuses, you will want to configure this option so you can arrange and add events based on their needs.
If your Church has multiple Campuses, you will want to configure this option so you can arrange and add events based on their needs.
-
1
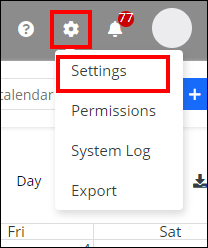
If this option is not available, click on the General Settings icon and then select Settings in the top, right corner of the screen (Database General Settings).
Scroll to the bottom of the General Settings area and then enable the Multi-Campus Feature with the toggle slider. Then, add the names of your other campuses.
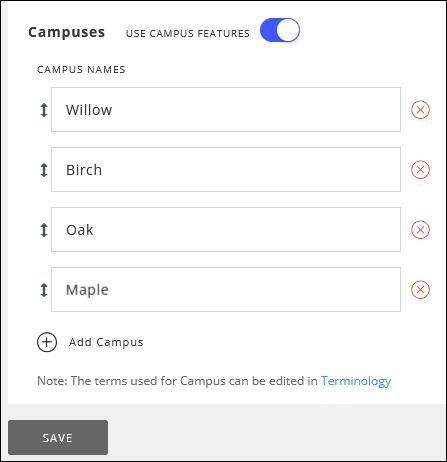
Click SAVE to add this change to the database.
After the campuses are added, you can now finish setting them up in the Calendar with details around each location.
- Click Calendar within the left navigation menu.

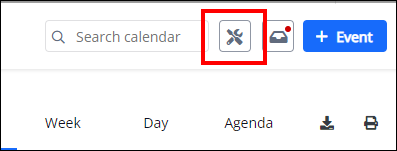
- Click on the calendar settings icon at the top, right corner of the screen.
- On the left-hand side of the screen click on Campuses.
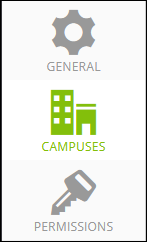
- Here you can see the list of Campuses setup from the Database General Settings
 . To add or remove campuses, use the database settings area to manage this.
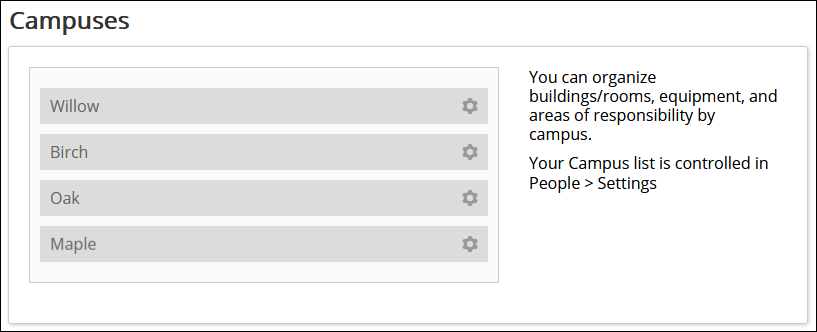
- Clicking on the Settings icon next to the campus name to update specific location details.
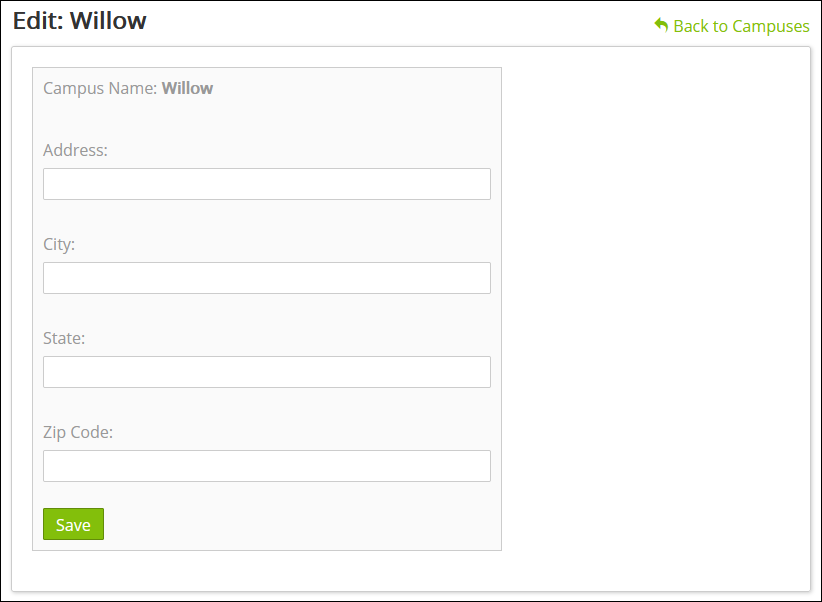
Click SAVE to add changes/updates to the Calendar campuses. You are now ready to assign events in the calendar to the appropriate campus.
Did this answer your question?
If you still have a question, we’re here to help. Contact us