Tips and Tricks for Better Workflows
Workflows are automated processes that can be built directly into your database and are designed to multiply your ministry efforts, giving you back valuable time in your day!
Here are some tips that we believe will help get you started and to maximize their use:
-
11) Use Good Naming Conventions When Creating Workflows
- The Workflow dashboard by default organizes your Workflows alphabetically. So, it is good practice to define categories for your workflows and use that category as the first word in the Workflow title. Something like First Time Visitor - Follow Up Email would work well and this will group all of your First Time Visitor Workflows together so they are easy to find and manage.
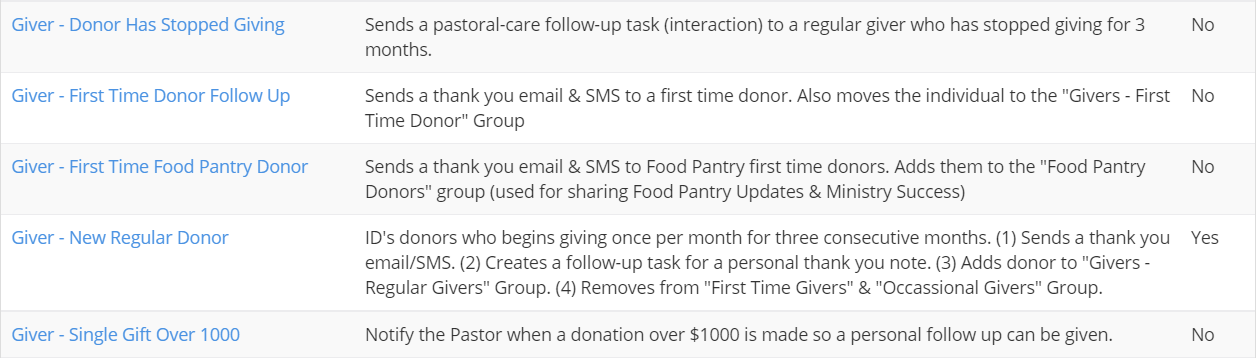
- If you have Workflows that are high priority or are used frequently that would be sorted towards the bottom alphabetically, a simple trick would be to add a symbol at the beginning of the workflow title. An asterisk or a dash work very well in a case like this. For Example, *First Time Visitor or -First Time Visitor would rise to the top of your Workflow Dashboard.
-
22) Utilize Workflow Descriptions
- Once you've established your naming mechanics, now you can focus on creating good habits in Workflow Descriptions.
- Workflow descriptions display adjacent to the workflow name in the dashboard and are incredibly helpful as a quick reference as to what the workflow was designed to do. This sets you, your staff, and your volunteers up for success in the future as you refer back to the workflows that are being used in your ChMS.

-
33) Test Your Workflows
Test, test, and retest. Building a new workflow can be intimidating and you may find yourself wondering if it is going to function properly. Luckily you are able to test the workflows you have built to give you peace of mind.
To test a workflow:
- Preview People Matched and Run Now are both selectable options within the workflow using the tri-dot icon.
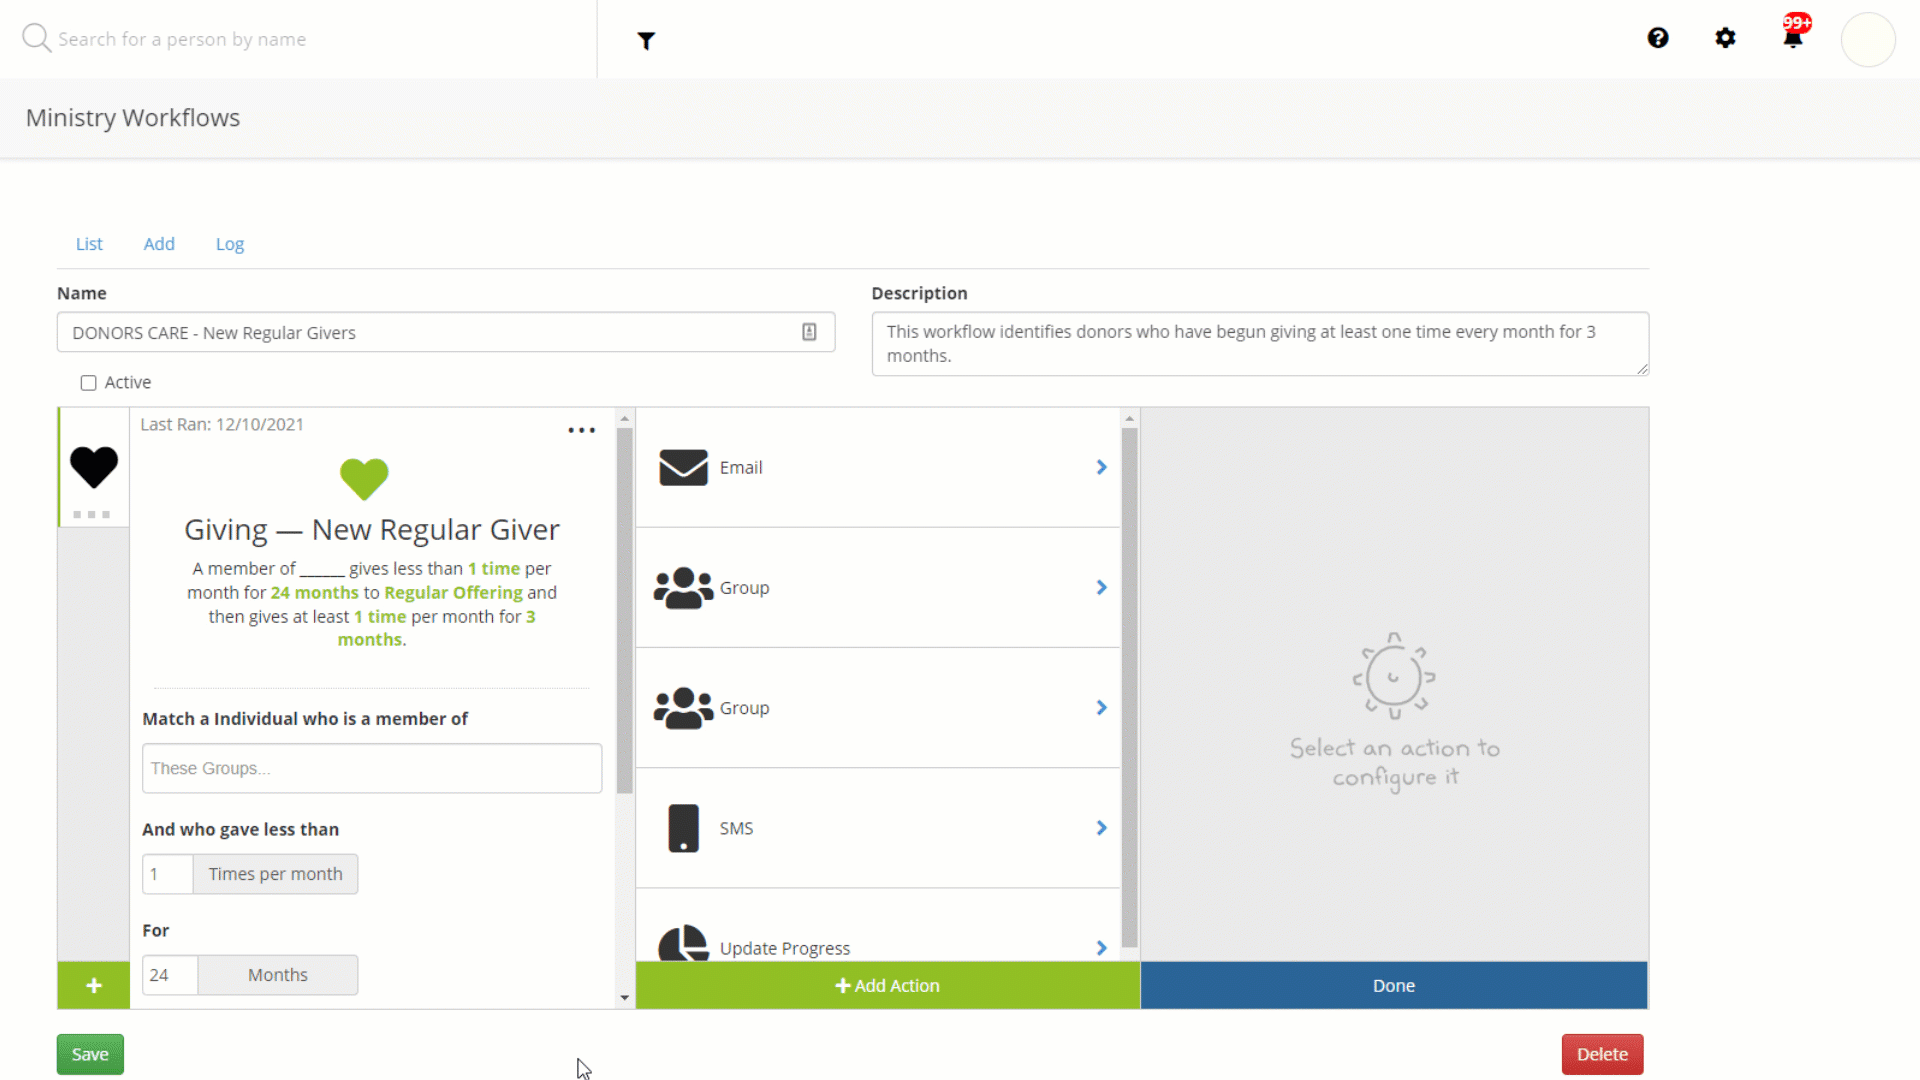
- Use your own record or create a test individual that you can use to test your workflows.
- For example: If you build a workflow to send an individual a Thank You! email after submitting a form, use your own record, or your test record to fill out the form and see if the Thank You! email is sent!
- Not all Workflows can be immediately tested. To see which workflows will trigger immediately, and which ones might take some time, check out our article on that HERE!
-
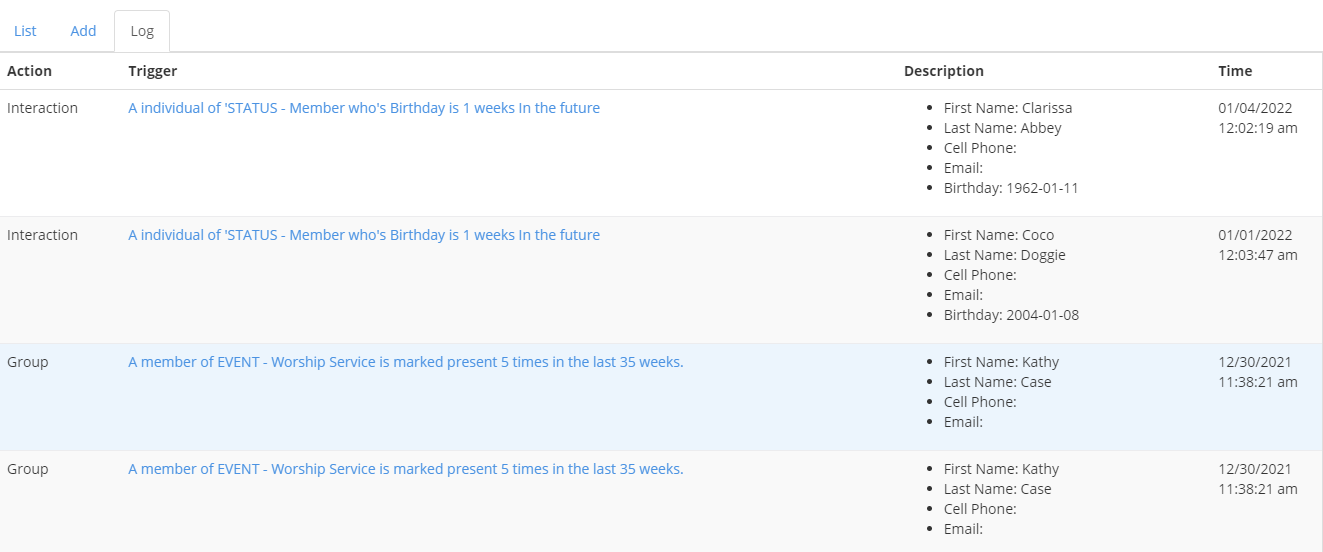
44) Utilize Your Workflow Log
- Located on your workflow dashboard is your Workflow Log. This is a great tool to see the workflows in action as it is a record of the workflows that have been triggered and the actions that have taken place as a result.
- Simply click the Log tab on the dashboard and you will be presented with the information of the most recent actions and triggers that have taken place as well as the description of the individual and the time that it occurred.
- Not only does this assist you in your testing of workflows and making sure that they are accomplishing what they were designed for, but it is also a great way to refer back to should you ever need to find the exact information on what was sent, to whom and when it was sent.
- To search your Workflow Log for a specific individual for example, simply use your computer's Search Page function (CTRL + F on Windows)(Command + F on Mac) and type the name of the individual you would like to find.
-
55) Understanding Update Progress
Workflows are designed to accomplish specific tasks. Within those tasks, certain steps need to happen in sequential order OR certain events need to be sure to happen only once. This is where the action Update Progress comes in.
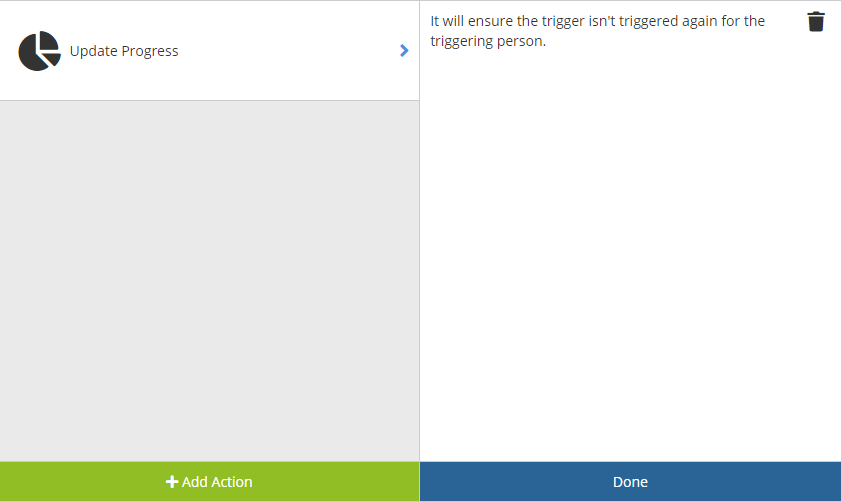
Update Progress is helpful when there are processes that require linear steps where 2 things need to be true before performing the action. With that, it accomplishes a few major things:
- Creates a logical order for the Triggers and Actions within the workflow. In a workflow with multiple triggers, without update progress defining the steps in which it should occur the triggers would all fire simultaneously when their criteria are met.
- Trigger 1 will fire once its criteria are met. *Update Progress*
- Trigger 2 then fires once its criteria are met. *Update Progress*
- Trigger 3 then fires once its criteria are met. *End of Workflow*
- It is able to ensure that the trigger used is not triggered again for the same individual. An example would be a thank you email sent to someone who gives/donates for the very first time.
- Creates a logical order for the Triggers and Actions within the workflow. In a workflow with multiple triggers, without update progress defining the steps in which it should occur the triggers would all fire simultaneously when their criteria are met.