How to send a Mass Email Using Simple Church
-
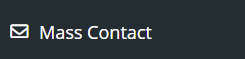
1Select Mass Contact
-
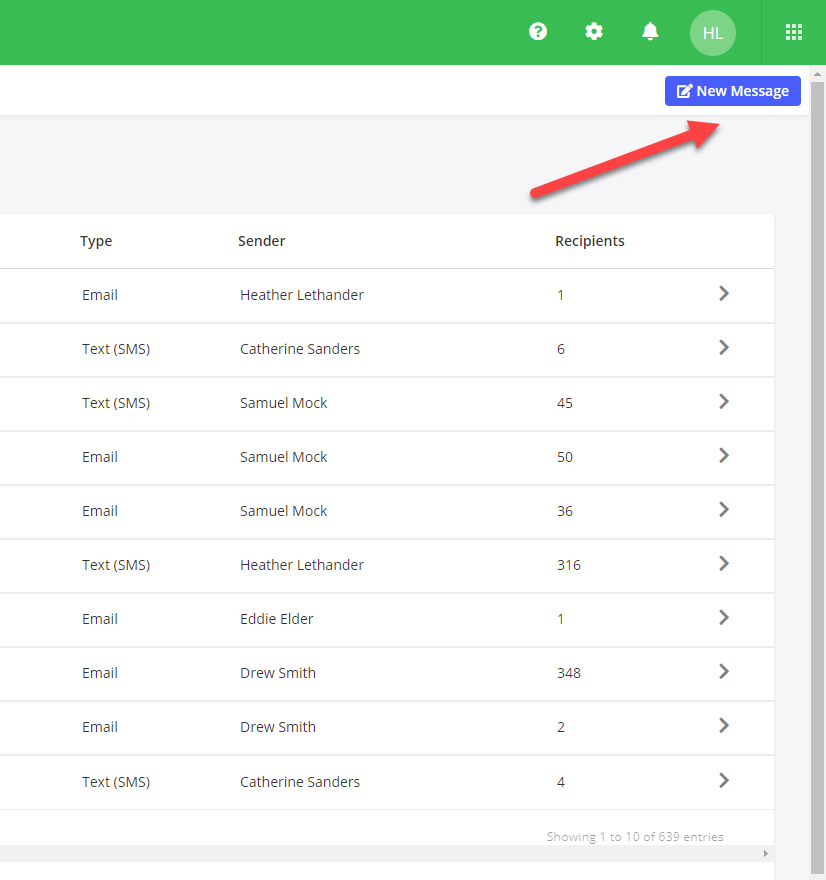
2Select New Message
-
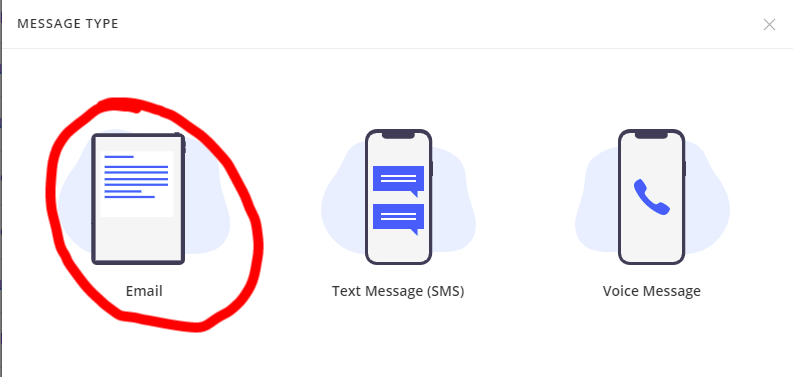
3Select Email
-
4Select Recipients
- Start typing a name to activate the search against your Group list. Relevant results will display below the search bar.
- Click the Group name to select it.
- If more Groups are needed, search again to add additional ones.
- Remove a Group by clicking the Grey "X" next to the group name.
- A Group is a collection of names. Use the 'Add Recipients' or 'Edit Recipients' options to edit the list of names manually.
- The 'Add Recipients' option allows a stand-alone way to manually create a list of contacts from the database instead of using a Group. This way, you can quickly send it to a single person or a few people.
- By clicking on 'Edit Recipients,' the populated list allows you to uncheck anyone you do not wish to include in the Contact.
Please Be Aware:
- To email an individual, they must be a contact in your Database. You cannot simply type/paste in email addresses for spam and other reasons.
- The total amount of recipients on a contact email is capped at 5000 contacts. Having more than this will result in an error.
To send info to our CHPC community, select the following groups:- *Relationship - 3Cs Nursery School
- *Relationship- members
- *Relationship - Regular Attenders
- *Relationship - Staff
-
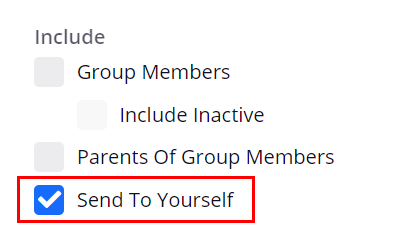
5How to Contact Group Members, Parents, or Copy Yourself
The three options are
- Group Members - Anyone noted as active in the Group(s) selected.
- Include Inactive - Optionally include anyone who is marked as inactive in the Group(s) selected.
- Include Inactive - Optionally include anyone who is marked as inactive in the Group(s) selected.
- Parents of Group Members - Handy for youth staff! Choose a group(s) with children in it. Then, anyone with a parent position will get the email based on the family relationship statuses in the linked family (Family positions of Primary, Spouse [husband or wife], and Partner).
- Send To Yourself - Add yourself as a recipient of the message, especially if you are not one of the people in the group or contact list. A copy of the message will be sent to your primary email address.
Send to Group Members AND Parents: Select both Group Members and Parents of Group Members boxed MUST be checked.
Send to Parents ONLY: Ensure that JUST the Parents of Group Members box is selected. - Group Members - Anyone noted as active in the Group(s) selected.
-
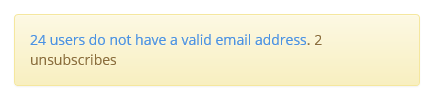
6Individuals without a Phone or Email Address
If members in the Contact list do not have valid contact information, a notification appears and lets you know this, along with a count of how many people may potentially be unsubscribed (Troubleshooting FAQ). Member email addresses in this list can be updated in the modal after clicking the link or finding the member profile and resolving it under the Edit tab.
-
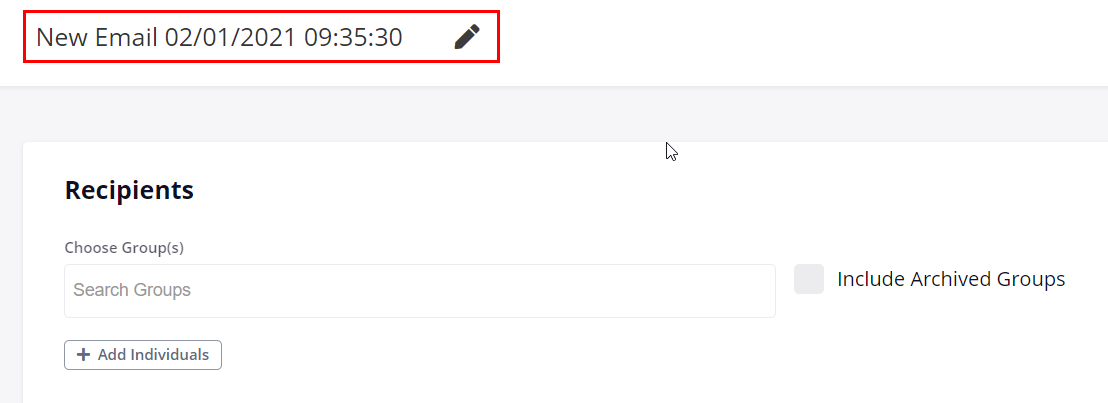
7Title Your Email
To give your email, series of emails, or email campaign a name, enter it into the appropriate field. It can be found at the top of the page; simply click the pencil icon to edit. Unlike the subject, recipients will not see this title. Instead, it can be used for reference and organization within your email history.
-
8Customize the FROM Name
Customize the name a recipient will see when the message is delivered. By default, this is populated with the name of the logged-in user. This can be customized to something like 'Youth Minister' or 'Church Admin' to make the message easily identifiable.
-
9Email Subject
Add an appropriate subject line. Like the message above with the subject of 'WEEKLY SCRIPTURE'. When adding a subject line, the title of the email will mirror the subject.
-
10Prevent Recipients from Viewing Others Email Addresses
Check off Send Personally Addressed Messages to keep recipients from viewing other email addresses when they receive your email. This option equals being Carbon Copied or Blind Carbon Copied. Note the directions below the checkbox before unchecking this default setting.
-
11Personalize with Name Placeholders
Use @NAME or @FULLNAME to dynamically insert an individual's member's First Name or First/Last name, respectively. If a Preferred Name is in the member's profile (Ex, Robert & Bob), the Preferred Name will be used (Ex, Bob). Other placeholders from the software are not supported at this time.
IMPORTANT NOTES:
- A placeholder must be in ALL CAPS to function.
- Send personally addressed messages must be checked for Placeholders to populate dynamically (screenshot above). -
12Message Body
Type and style your message using the available tools in the email editor.
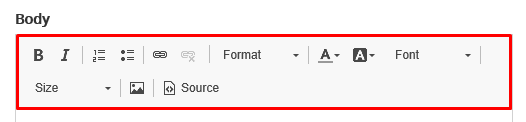
The editor is designed as a simple editing tool to create essential messages.
Pro-Tip: As a best practice, we don't recommend copying/pasting from outside software (email editors/MS Word) into the email message area. Doing so introduces hidden formatting that can cause display issues.
When copying and pasting are needed, we advise using a text editor like Notepad or Text Edit. Paste your message content into the text editor of your choice to remove this hidden formatting. Then copy all of your now cleanly formatted text into the message editor. In the Contact email editor, your text can now be styled to your liking for the best results!
-
13Adding Images
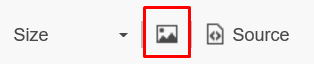
Images can be added by clicking the Image Icon and then copying/pasting the URL where the image is hosted. (Currently, you cannot upload an image directly from your computer. We hope to add this feature soon).
Hosting Your Image
Typically, you can upload and host your image within your website file storage area. Alternatively, you can use a 3rd Party file-sharing service such as Imgur, Dropbox, Amazon S3, etc.
Once you upload your image to your online hosting service, copy the URL, then paste it into the URL field in the image editor. (You will know your image has been added correctly when you can view it within the Preview screen).
Adjust other properties like height and width to your liking. Click OK to save the image to your message.
Note: When inserting an image via the website or file-sharing service the image URL must begin with "https://". If the site that hosts your image is not secure (does not include "s" in "https"), the image will not populate.
Pro-Tip: As a best practice, images for email should be 600-800 pixels wid, and the file sizee should be between 200KB - 1MB. Following these guidelines will result in the best display and load time across most email platforms & devices.
Two other tabs could also be important to review. There are the Link and the Advanced tabs.
- Link → This tab supplies the tools needed to make the image clickable and tied to an external source from the email, like a webpage. There is also the ability to set a 'Target' (basically, how should the link be handled). The most common option is the New Window (_blank) selection.
- Advanced → Add and customize further details around the image and the link. Custom styling can be added, and other details if needed. Most options here are non-essential for typical emails.
Pro-Tip: Take advantage of our integration with MailChimp or Constant Contact for more robust email templates and features. These solutions provide enhanced read rate tracking, metrics, custom templates, etc.
Alternatively, use a free email template creator (A simple Google search will yield multiple results). Create your email using their tools, then copy all the code they provide. In the system's email editor, click the Source button
 and paste it in.
- When using templates from 3rd party providers, we recommend first sending a test to yourself to check how it looks.
- Note: We cannot assist in troubleshooting template display issues from 3rd party email providers.
- Link → This tab supplies the tools needed to make the image clickable and tied to an external source from the email, like a webpage. There is also the ability to set a 'Target' (basically, how should the link be handled). The most common option is the New Window (_blank) selection.
-
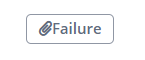
14Attachments
Ensure the attached file(s) are under 10 Mb in size (this is a consideration for one or multiple files). A large file will display a 'Failure' error as seen below.
Best Practice: We suggest uploading your file to your website storage or other file-sharing service and linking to your file - much like adding an image. This ensures fast delivery and avoids the potential of your email being marked as spam by different email providers.
Note: If you are attaching multiple files, ensure your total sum of all attachments does not exceed 10MB. A single small file will not show this 'Failure,' so knowing the size of all your files is essential. -
15Schedule Sending for Later
When a scheduled message is created, it is saved to the logged-in user profile. This is important to know if you need to adjust the scheduled message content, settings, or time.
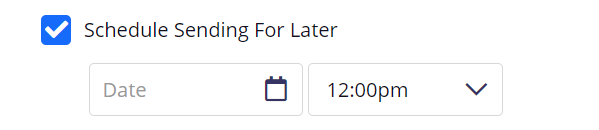
Check to schedule the message for later. Add the correct date and time you want the message to send. This time setting references the preference set for the time zone under General Settings
 → General.
Should the scheduled message need to be edited/changed, you can load it again. Select the message from the "Mass Contact" home screen, which will resemble the one found below.
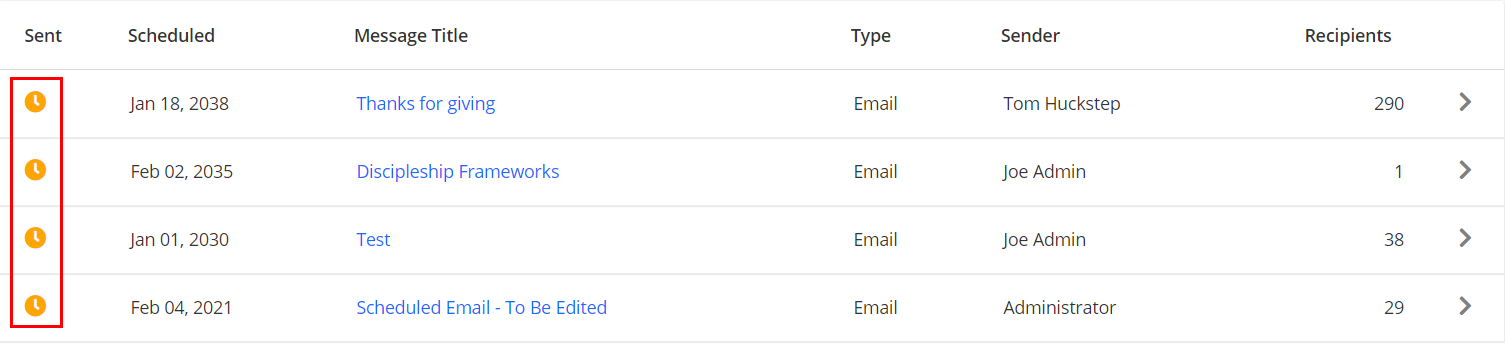
Once your email is selected, an email preview screen will appear. To edit your scheduled email, use the "Edit" button that can be found in the top-right corner of the screen. This will load the settings and the message body to update with new information. Use the blue "Schedule" button to save your updated email or red 'Delete' button at the bottom to fully delete the email if it is not needed anymore.
Complete the message by clicking "Send."
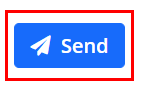
Once sent, the message is delivered to our email queue for sending on a first-come, first-serve basis. Typically this results in a quick delivery but depending on processing volume, there can be a slight delay. As always, if you have further questions, please feel free to contact our awesome support team through the '?' icon at the top right of the database window.
-
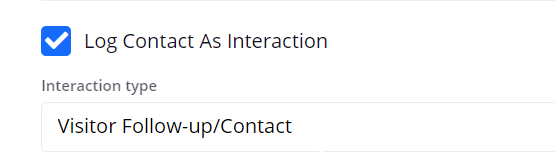
16Log Your Mass Communication As an Interaction
Logging a contact as an interaction is a great way to keep track of the contact(s) made to a member right on their profile. Your email will be logged under your interaction type with the message body for later reference.
-
17
-
18