5 Tips For Building Great Groups
Organizing people within your ChMS database is done primarily through Groups. At first, organizing everyone within your organization can feel overwhelming. But, by being proactive and intentional with your group building you can be successful from the very start.
Think through what you and your organization would like your groups to accomplish. Its main goal is to easily organize and centralize your people into easy-to-find groups.
Here are 5 ways to ensure that your groups are created well from the very start.
chmshelpdesk.com/hc/en-us/articles/10583794250...
-
11) Naming Conventions
When building your groups, utilizing simple and easy-to-recognize Naming Conventions will set you up for success as you build your ChMS. They are incredibly versatile and are vital for organizing and using groups.
- When naming groups, consider simplifying the name into something easily recognizable using 1-2 words.
- For Example:
- Student Ministry --> STUDENTS
- Adult Small Groups --> SMALL GROUPS or even SG
- Various age groups --> AGE GROUP - 5th Grade
- For Example:
- Groups are listed alphabetically by default, to raise certain groups to the top that otherwise wouldn't be, try using a "*" or "-" which will bring groups to the top of the list. For example, *Status - Member
- Typing the abbreviations in the Search Groups box will filter to just those groups.
- Group names used for Check-in will appear on the name tag and security tag.
- When naming groups, consider simplifying the name into something easily recognizable using 1-2 words.
-
22) Status Tracking
After deciding on Naming Conventions, we always recommend tracking the status of the people in your congregation. This is the person's primary relationship to the church and is used for almost every mass communication and workflow.
- Consider creating a Group for each status such as:
- -Status - Guest
- -Status - Regular Attender
- -Status - Member
- -Status - Contributor Only
- -Status - Friend of the Church,
- -Status - No Longer Attending
- -Status - Deceased
- Any others as needed, but try to keep it as simple as possible.
- For Children, consider using Status - Guest, then Status - Regular Attender to match the parent's status, or using a status like Status - Child Attender.
- Creating groups like these is helpful and is used when doing Mass Communications and Workflows.
- Like what was stated above, you may want to name statuses with a special character so they show at the top of the group list when looking at a person's record and when selecting groups. For example, "-Status - Member."
- Some churches also use a Configurable Field of Status with a Select List, but this requires double data entry (groups and a field) with each status change.
- To change someone's status, you will "Move" them to another status group and set the Joined Date as the date they moved (it doesn't have to be today's date).
- You could also build a Workflow to automatically move them to the next group or to No Longer Attending, etc. For example, if a Visitor has attended 4 times, add them to the Regular Attender group and remove them from the Visitor group.
- The Created Date field for individuals gives you some history of when they first interacted with the church.
- Consider creating a Group for each status such as:
-
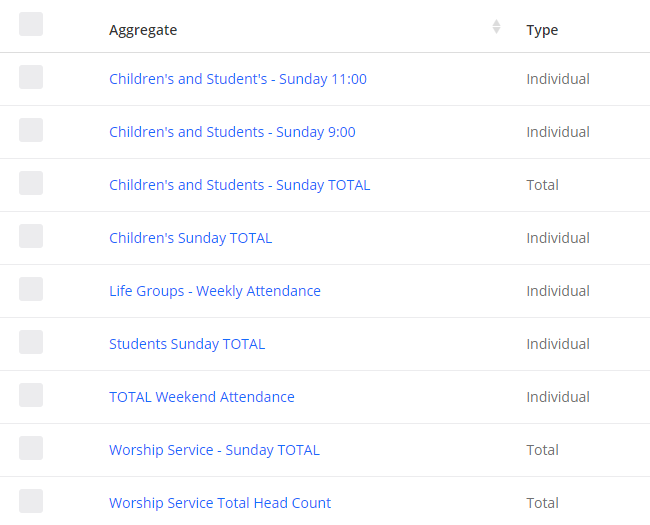
33) Aggregate Groups
To get quick totals of the attendance for various groups such as Children's Ministry, Small groups, etc., we recommend creating an aggregate group for each total you will want to see.
- With aggregates, you can’t create an aggregate group that includes both Individual-based attendance groups and summary-based attendance groups. The groups must be of the same type (all Individual-based or all Summary based). However, you can have an Aggregate of multiple types of Aggregates - they can be mixed.
- For example, you can create Total Children's (aggregate of individual) and Total Worship (aggregate of summary) and then create Total Weekend (aggregate of the other 2).
- Attendance Aggregate examples:
- Total Children's Attendance
- Total Adult Attendance
- Total Weekend Attendance (an aggregate of both Children's and Adult aggregates)
- Total Small Group Attendance
- Midweek Attendance
- 9:00 Preschool Only
- 9:00 All Children
- 11:00 All Children
-
44) Group Properties
Set up group properties lists in the settings area. They allow you to filter in the Groups tab and more easily create attendance reports. Properties can be used for specific user rights and naming conventions cannot. However, naming conventions are vital for organizing, finding, and using groups. Therefore we suggest using both properties and naming conventions. Groups can be in multiple Categories with multiple Properties. For example, the Smith's Home Group could have a Type of Small Group, an Age of Adults, and a Campus of Campus B.
-
55) Group Finder
- Can be published on your public website or just on your ChMS for your attendees to see if they have an account.
- People can view a list or a map to display the groups. You choose the default view in Settings > Groups > Group Finder.
- Can also be used for Ministry Teams to help people find their place to serve. Can be used for Classes as well.
- Common filter options in addition to the above include Campus, City or Part of town, and Meeting Time (early morning, morning, lunch, afternoon, evening).
- 2 Options for people to "sign up" - the group settings allow you to select:
- Allow people to request to join the group (Recommended) - it will ask them to type in their name, email, and phone number, which is emailed to the group leaders to follow up.
- Allow people to add themselves to the group -Typically only used for a once-a-year major sign-up.