Tips to Increase Group Involvement with Group Finder
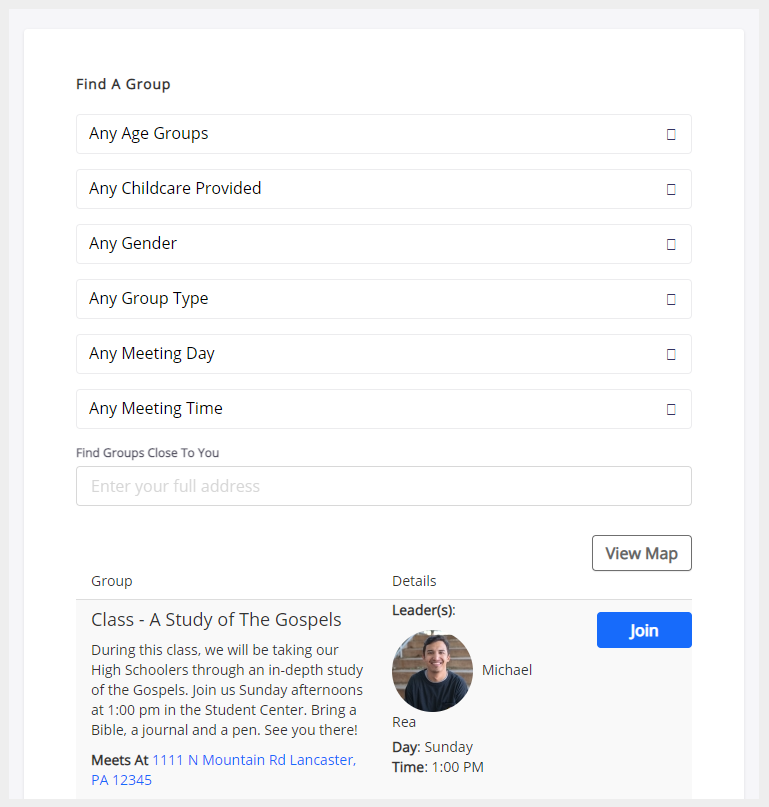
Use the Group Finder to allow people to search, explore, and add themselves to groups, classes, ministry teams, and more! You control all filter options - even the ability to search geographically!
No more 'man-in-the-middle.' When an individual joins, it emails the group leader with an individual's contact information and *adds the individual to the group! *(if you set it to - not required).
chmshelpdesk.com/hc/en-us/articles/10483961552...
No more 'man-in-the-middle.' When an individual joins, it emails the group leader with an individual's contact information and *adds the individual to the group! *(if you set it to - not required).
chmshelpdesk.com/hc/en-us/articles/10483961552...
-
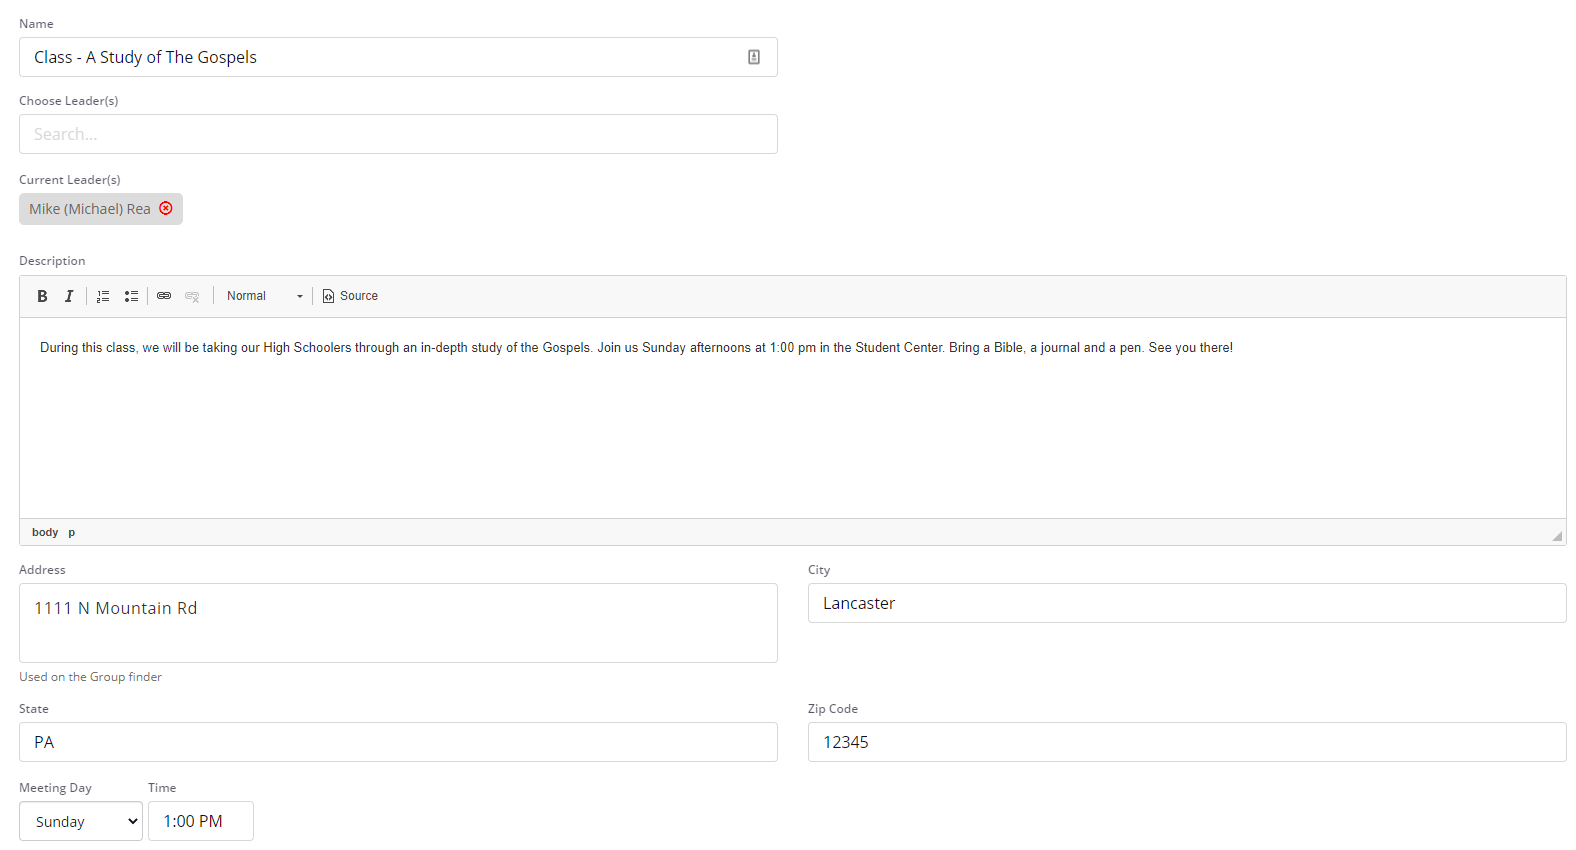
11) Build Groups with as much information as possible.
- Group Finder’s power is found largely in the information provided in the Group itself.
- When setting up a Group with Group Finder in mind, the only required field is the Name of the Group. However, having accurate information in all categories (Description, Leader(s), Address where the group meets, and Meeting Date & Date) will give individuals looking for a Group to Join a more holistic and in-depth view into the type of Group they want to join.
- Additional Group Finder information can be found in the Group Finder settings. Make sure the Group Finder is enabled, choose if you would like the Group Leaders picture to be displayed, and then choose the categories people can use to find the Groups by.
-
22) Decide how you would like individuals to add themselves.
- From your Group Finder, users will have the option to click 'Join' when they have found a group that fits their needs. While building Group Finder, you have the opportunity to determine whether they can automatically join a group, or, you can allow the leader of the Group to approve a request to join a group.
- When you allow people to request to join the group:
- People who try to join the group will not be added automatically. Instead, the leader of the Group will be emailed and will be given the chance to approve or deny the request.
- When you allow people to add themselves:
- The leader of the Group will receive an email alerting them that an individual has joined the group.
- When you allow people to request to join the group:

Important Note: These two options are either/or. Only one can be active at a time, so make sure to determine which way you would like individuals to join your groups.
- From your Group Finder, users will have the option to click 'Join' when they have found a group that fits their needs. While building Group Finder, you have the opportunity to determine whether they can automatically join a group, or, you can allow the leader of the Group to approve a request to join a group.
-
33) Utilize Group Properties
- Build your Group Properties within your General settings
- Gear Icon → Settings → Groups → Group Properties
- In this management area, you can now start to define the properties that you want Your ChMS to have as tagging options. The setup is simple in that you can define first a Category for the rest of the Properties to be added under.
- Apply the Group Properties to the desired Groups, giving your users the ability to see those properties and letting that help them make the best decision on what group to join.
- Build your Group Properties within your General settings
-
44) Display the Group Finder on your website!
- Using the embed code found in your settings, choose somewhere on your website that will be easy to find and will highlight the Group Finder. A great place could be under something like a ‘Get Connected!’ tab!
- The embed code can be found under Settings → Groups → Group Finder
-
5
Did this answer your question?
If you still have a question, we’re here to help. Contact us