Using the Guillotine Paper Cutter
The guillotine paper cutter is located in the 2nd floor print room. It is designed to cut many papers at one time. This machine has safety features built-in for proper usage. It has a heavy, sharp blade, so do not circumvent the safety measures!
-
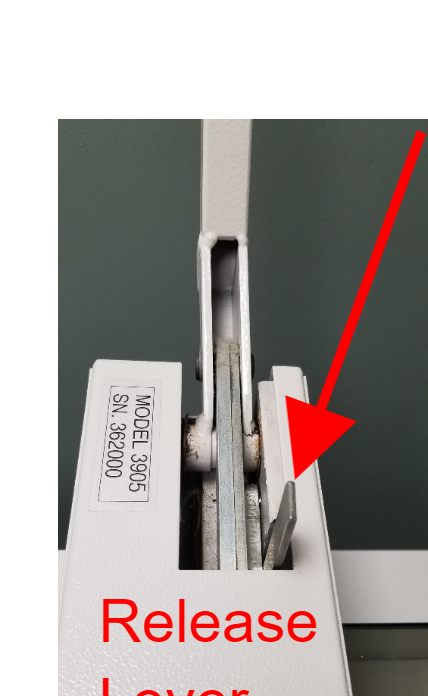
1Make sure blade is properly secured before usingBlade and handle should be at a 90* angle and not able to move downward when the blade is locked. The lever (seen next to the arrow) will not move if the plastic shield is not down in the proper position.

-
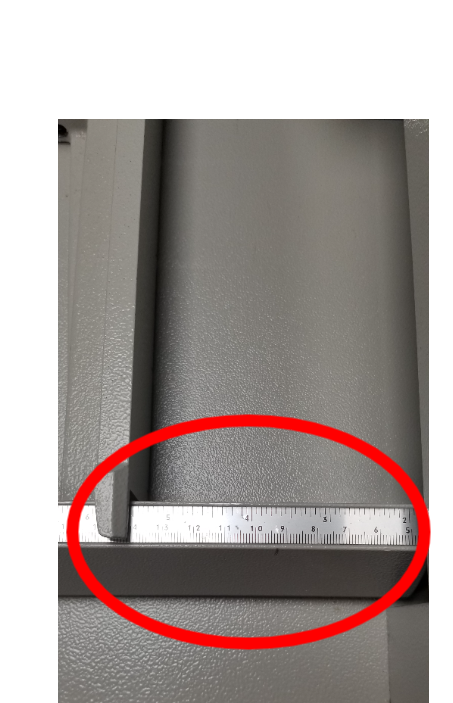
2Adjust ruler guides for where you want the cut.Use ruler to set where you want to cut the paper. Use handle crank on right side of guillotine to adjust the ruler.

NOTE: When lining up the paper edge to the ruler, use the bar to measure the distance. The notch is slightly larger than where the paper actually will fall. There is a black line drawn on the inside of the ruler to show where the bar should be for 5.5" and 4.25" (our most common cuts). -
3Put paper into the machinePaper should be tight against the ruler and the adjustable bar. Make sure that the paper is square in the guillotine.
-
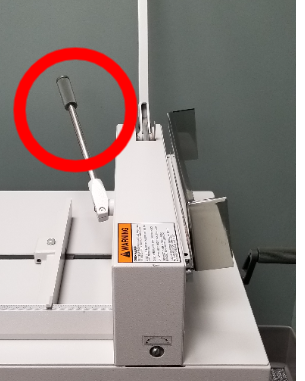
4put down level to hold paper in placePull the handle toward you and it will sit on top of the paper to keep it from moving when you cut the paper.

-
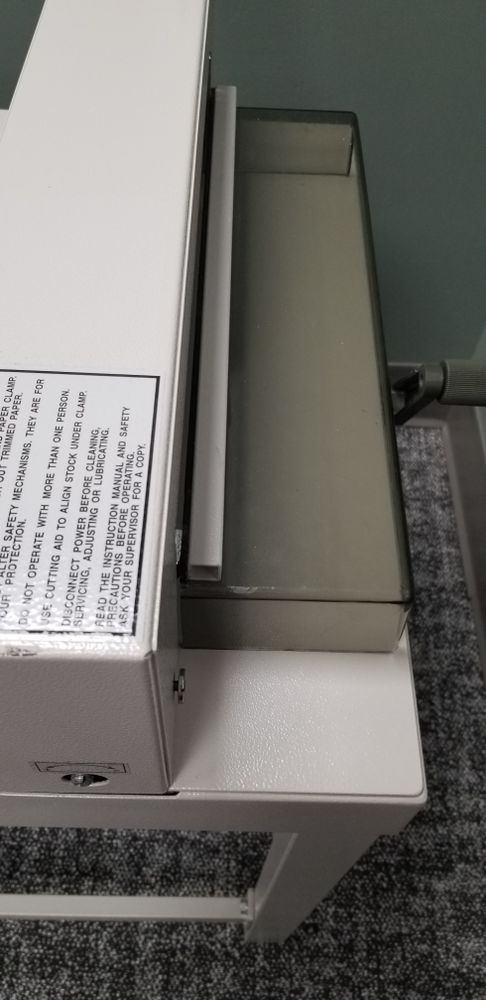
5Lower clear protectorPush down the clear plastic protector on the right of the guillotine. This is so fingers can't get in the way of the blade! this image shows the protector in the down (locked) position.

-
6Release bladeOnce the lever is down, the clear shield is down, you can release the blade to make your cut. The blade is completely shielded by the machine so there is no danger to use it as long a
 s you follow the safety precautions.
To release the blade, hold the long handle with your left hand and jiggle the release lever with the right hand. Once you have released the lever, you will be able to lower the handle with the blade. -
7you can do a check cut if necessaryYou can press down the blade gently and it will make an indentation in the paper showing where the cut will be.
-
8Press down firmly on blade to make cutHold the blade handle and push down firmly to cut through all the paper. I find it best to bring down the blade half-way and then firmly push the rest of the way.
-
9Secure bladeReturn blade to 90* upright position where it will remain locked when you release it.
-
10Open protective plasticProtective plastic shield will not open if the blade is still engaged.
-
11Release paper weight
-
12Remove paper
Did this answer your question?
If you still have a question, we’re here to help. Contact us
