How to Document a Procedure

What you need to know about Procedure Documentation

Now that you have learned the Anatomy of a Well-Crafted Procedure, it is right time to apply your learning by communicating the information you'd like to establish a procedure, clearly and effectively. 

The key to getting more work done is the ability to easily delegate and assign that work to others. That means documenting how a task should be carried out, step-by-step (in excruciating detail).

Is this easy? Not at first. Is it enjoyable? Never.

But once you get adept at doing this, your work will get done more reliably, more easily, and with less involvement on your part. Think of this as setting up a rocket ship to launch into space. There's a lot of planning, and then eventually there's a launch where a significant amount fuel is spent on just getting the rocket off the launchpad, and then into low orbit.

Once you get your "procedure-documenting rocket" into orbit, the effort required to keep things moving will be minimal. So, with that overview, here are the steps to use to effectively document any kind of workflow or procedure.

Here are some things to consider when documenting a procedure:

  1. Identify the purpose and scope of the procedure. 
  2. Outline the steps or actions involved.
  3. Review, proofread and revise.
  4. Get feedback to identify any areas where the procedure may need further clarification or improvement.
  5. Finalize the procedure.
  1. 1

    Decide what workflow to document

    The Big Picture


    Ideally, you want to start with a workflow that's
    • Repetitive 
    • Significant
    • Has concrete action-steps
    • Fairly short & simple
    • Delegatable

    If it's repetitive, that will allow you to get feedback more quickly, and also it will make the documentation more valuable becuase it's being used more often.

    Documenting a significant workflow will motivate you more than trying to document a simple, but trivial workflow. And yet, you must be careful not to reach for the stars too quickly.

    When you are first documenting workflows you're also practicing the basics. So keep things simple, as much as you can.

    Finally, try to document workflows that you can delegate to other people. This will motivate you more, and also make the workflow more valuable in terms of freeing up your time.
  2. 2

    Start with a simple outline of action steps

    Brainstorm first

    Start by brainstorming the workflow in outline form, using bullet points or numbered checklists.

    This is an example of bullet point "outlining"

    • Set up new client record in practice management software
    • Create new record for client
    • Insert contact information 
    • Associate client record with existing matter
    • If it's a new matter, create new matter and then associate client record
    • Add important deadlines or milestones for the matter

    This is an example of numbered "outlining"

    1. Login to practice management software
    2. Create new matter, if it's for existing client
    3. If client is new, then create new client record first
    4. Add client contact information
    5. Associate client record with matter
    6. Add important deadlines and milestones for the matter
    7. Email the responsible attorney that the client matter has been set up.

    As you start brainstorming you'll inevitably discover that there are more steps than you first realized. You'll also start to realize that you need to...

  3. 3

    Identify & supply the resources needed to perform the task

    Identify & Gather All Necessary Resources

    In most cases a workflow will require the person doing it to gather resources to do some of the steps.

    For example, if you're asking someone to login to your website to post content, or make changes, they will need to have:
    1. The URL of the website admin login (for WordPress sites this would usually be name_of_website.com/wp-admin)
    2. The username to use to login
    3. A valid password for that username

    Or they may need access to documents, which hopefully are in digital form because that makes it easy to share a link to the documents. Which, by the way, means that LINKS can be resources also.

    Bottom line: figuring out the documentation for a workflow often involves more than just giving people the steps for doing the task. You also need to consider what resources are needed, and then how best to provide them to the person doing the task.
  4. 4

    Study examples of well-documented procedures

    When you're starting out documenting procedures it helps to have a sense of what a well-documented procedure looks like.

    Here are some helpful examples:


    Recommended books on this topic:

  5. 5

    Use screenshots to help explain

    Using a screenshot is a powerful way to explain how to navigate the user interface of software or websites.
    Learning how to create screenshots is an essential skill in documenting modern procedures.

    If you Google "How to create a screenshot" you'll quickly discover what you need to know.

    Here's an article I think best explains it for both PCs and Macs. The link to that article is valid now, but, in the future, the link might be broken. That's one of the risks of using links to provide resources (as discussed in step #3 above).

    Windows Screenshot keyboard shortcut

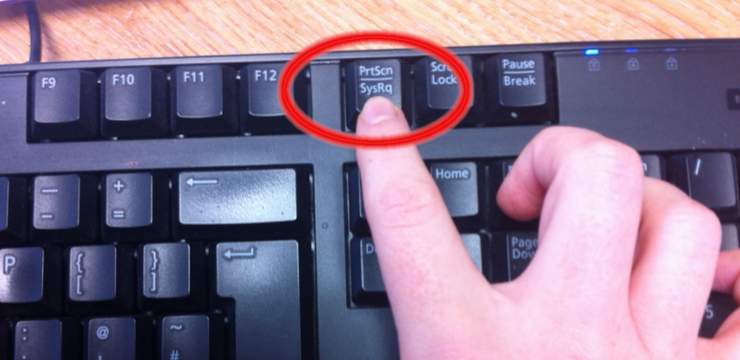
    Mac Screenshot: keyboard shortcut

    Screenshots on a smartphone

    Generally speaking, to take a screenshot on a phone or tablet, you press the power key and the home button at the same time. Your screenshot will probably be added to your photo gallery.  
  6. 6

    Use videos to help explain

    Sometimes it helps to explain a process by video recording the process being done. This used to be hard to do, and the software was expensive and hard to use

    But not anymore. Check out the popular video recording tool called Loom.
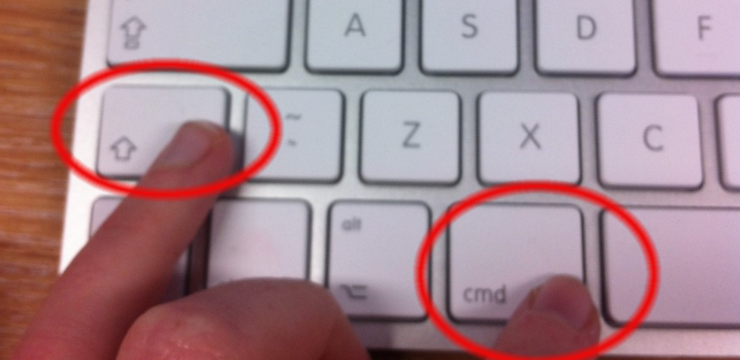
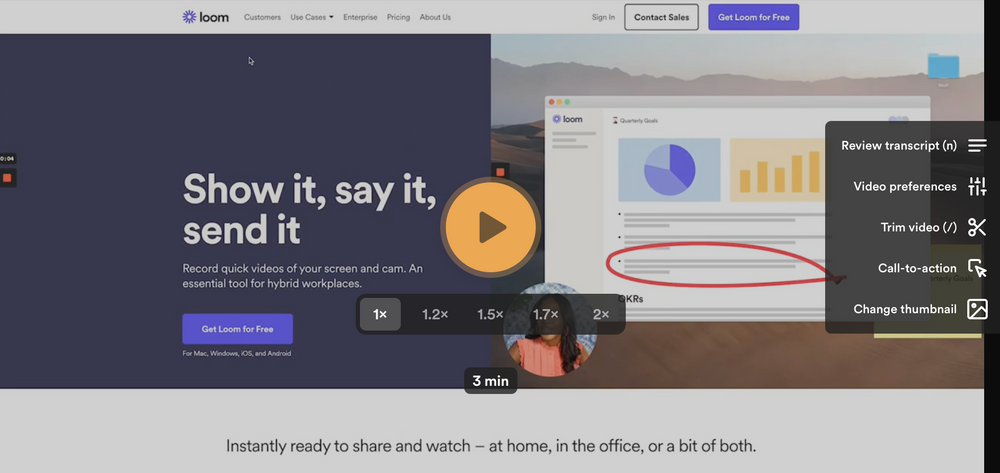
    Loom is the easiest way to create videos. You can record screen, voice and face in one click. It’s perfect for onboarding new employees, or explaining any kind of computer-based workflow issues.

    You can record a video in less than five minutes and get back to what matters most - working on your practice.

    You can get started right away for free. And you can keep using the service for up to 100 videos, as long as they're less than 5 minutes long (explanatory videos should not be longer than that).

    If you want to get the increased level of service, it's only $10/month and totally worth it. That level includes auto-generated transcripts that are time-stamped and hyperlinked so the viewer can easily click to jump to relevant parts of the video.

    You can also create Loom videos on your smartphone (iOS or Android).

    And here's one of the best features: as soon as someone watches your Loom video you'll get notified by email. That means that if you send a video to your virtual assistant or colleague, you'll know the moment they watch it.

    How to Create a Free Loom Account

  7. 7

    Work smarter by creating better systems for your practice

    Learning to document procedures is one aspect of "working smarter" which is what this course is all about.
    Documenting procedures the most important element for doing law-focused knowledge work more easily and more effectively.

    Overall, documenting procedures will help you create systems for running your practice better. To learn more about creating systems, check out this program