Guide to Unearth Home Energy Leaks: Maximise Efficiency Using Your FLIR Thermal Camera


Want to boost your home's energy efficiency and contribute to a happier planet? This guide empowers you to become a waste energy detective, using your FLIR thermal imaging camera to hunt down energy leaks like Sherlock Holmes . You'll find tips on where to focus your camera and how to formulate an actionable plan for a cosy, cost-effective home.

  1. 1

    Seasonal Considerations: Summer vs Winter

    Summer: Keeping the Cool In

    In the sweltering months, the objective is to keep your cool air inside and the hot air outside. Here's what to focus on:
    1. Windows and Doors: Look for blue spots which indicate cold air leaking out.
    2. Air Conditioning Vents: Make sure the cool air is being efficiently distributed within the room and not escaping.
    3. Walls Facing the Sun: These walls can absorb more heat; make sure they are well-insulated to prevent heat from seeping in.
    4. Roof: Heat can accumulate in the roof cavity and find its way into the house. A thermal scan can help you pinpoint these hotspots.
    5. Cracks in Floors and Walls: In the summer, even a small opening can let in a lot of heat

    Winter: Trapping the Warmth

    In winter, it's all about keeping the heat inside and preventing the cold from entering. Here's what to look for:
    1. Windows and Doors: Purple/darker spots on your thermal camera can indicate heat escaping.
    2. Fireplaces and Chimneys: These can be major sources of heat loss if not properly sealed when not in use.
    3. Heating Vents and Radiators: Confirm that they are efficiently warming the room and that the heat isn’t escaping unnecessarily. You can purchase covers to go over them for the time of the year that they aren't being used.
    4. Exhausts: Kitchen and bathroom exhausts are often just big holes in your ceiling allowing your warm air to escape. You can purchase baffles for these to keep warm air in.
    5. Outer Walls: In the winter, it’s these walls that need special attention for heat retention.
    6. Ceiling and Roof: A lot of heat can escape upwards; make sure your roof cavity is well-insulated. Look for cold patches and particularly along outer walls where perhaps insulation was missed.
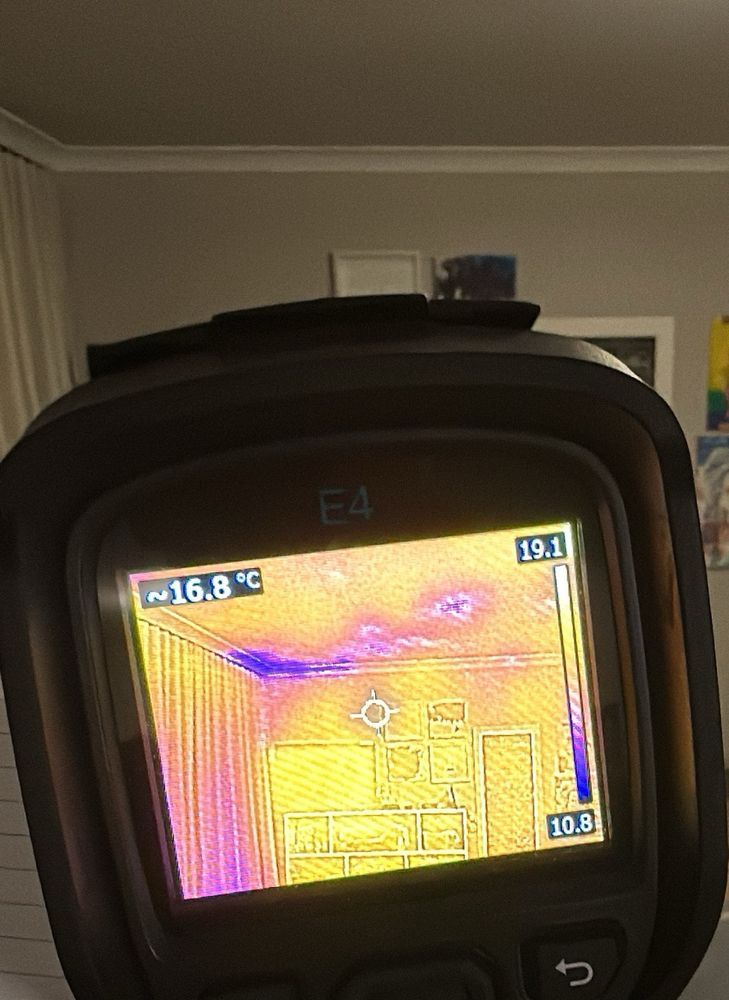
    Remember, the colour indications on your thermal camera will reverse depending on the season: in summer, you're looking to keep the blue/purple (cool) spots inside, while in winter you want to retain the red (warm) spots. Keep this in mind as you conduct your scans to get the most accurate, seasonally appropriate results.
  2. 2

    Materials Needed

    1. FLIR Thermal Imaging Camera (fully charged)
    2. Notebook
    3. A mate to lend a hand, if possible. You could run the camera, and call out for them to note down.
    4. A sketched out map of the rooms in your home.
  3. 3

    Easy to use

    Worried about handling your FLIR E4? Don't be! This thermal imaging camera is designed to be user-friendly and straightforward. Essentially, it's a point-and-shoot device. Just aim it at the area you want to inspect, and the thermal image pops up on the screen. No endless button pressing or complex configurations required.
    Rest assured, the FLIR E4 Wifi is a breeze to use, so you can focus more on making your home energy-efficient and less on figuring out the tech. Happy scanning!
  4. 4

    Preliminary Steps

    1. Temperature Differential: Aim for a noticeable temperature difference between the inside and outside of your home—around 4°C+ is ideal. This is where you'll make a big difference for little effort.
    2. Switch Off Fans and Air Cons: Doing so ensures airflow doesn’t skew your results.
    3. Night Owl Advantage: Conduct the test during twilight or nighttime to reduce the impact of solar heating.
  5. 5

    Turn on the thermal camera

    There is a power button  (circle with a line through it) in the bottom right (red arrow). This is likely the only button you'll need.
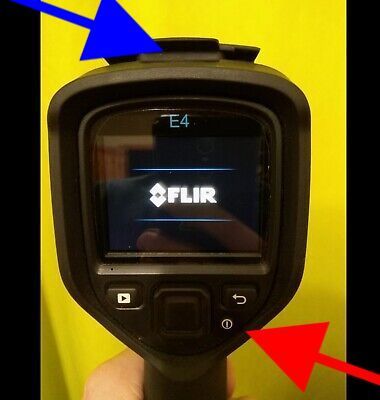
    Give the unit a charge. the flap up the top opens up revealing a mini usb connection that can be used with the provided charging cord, you can plug into a normal powerpoint to charge the unit.

    Running the unit when it has low batteries can permanently degrade their capacity.
  6. 6

    Kick-off Indoor Scan

    1. Windows and Doors First: Typical sources of draughts.
    2. Inspect Walls: Especially the ones facing outside.
    3. Look Up and Down: Check ceilings and floors.
    4. Mark the Spots: Mark areas with a large temperature differential on your sketched out map.
    5. Note It Down: Record locations, estimated temperature differences, and any unique patterns.
  7. 7

    Dig Deeper for Hidden Leaks

    1. Powerpoints: Particularly those on outer walls.
    2. Where the Pipes Are: Check where pipes come into and go out of walls.
    3. Downlights: These can be sneaky spots for heat loss.
    4. Crawl Spaces and Roof Cavities: Out of sight shouldn’t mean out of mind.
    5. Exhausts: Kitchen rangehoods, bathroom exhausts all are a big source of air exchange, even when they are turned off.
  8. 8

    Venture Outdoors

    1. Exterior Walls: Correlate these with your indoor findings.
    2. Roof and Eaves: Keep an eye out for escaping heat.
    3. Foundations: Sometimes cracks and gaps here can let in cold air.
    It may be hard to spot leaks from the outside, particularly in homes with brick veneer as the brick has been warmed by the sun during the day.
  9. 9

    Crunch the Numbers and Prioritise

    1. Review Your Findings: Identify the problem areas.
    2. Measure Up: Use your measuring tape to gauge the size of the gaps or areas needing treatment.
    3. Weigh Up Your Options: Consider costs and benefits to decide which fixes to tackle first.
    Many of your problems will be as a result of spotty ceiling insulation and poorly sealed windows and doors. Try to find a pattern in the types of problem areas you are seeing. It can make it quicker for you to mark down and to find a solution.
  10. 10

    Get Stuck In!

    1. Seal with Weather Strips: Start with doors and windows.
    2. Find and fill missing or shifted insulation: It happens, often the insulation gets misplaced over the years up there.
    3. Layer Up with Insulation: More intensive fixes for bigger issues.
    4. Call in the Cavalry: For complex fixes, you might consider additional help (only if it's beyond your DIY abilities).
  11. 11

    Example Notebook Entries

    Room
    Area
    Δ Temp. (°C)
    Notes
    Indoor Scan


    Living RoomWindow
    6weatherstrip needed
    Kitchen
    Exhaust
    6
    Baffles to prevent heat leaving
    Bathroom
    Powerpoint
    3
    Consider plug when not in use.
    Kids bedroom
    Ceiling near window
    4
    Patchy insulation
  12. 12

    Blank Notebook Entries

    Room
    Area
    Δ Temp. (°C)Notes


  13. 13

    Troubleshooting

    1. Battery Symbol Displayed or Unit Immediately Powers Off: This indicates that the battery is low. Plug the unit into a charger and wait until it is fully charged before using it again. Running the unit on low batteries can permanently degrade their capacity.
    2. Too Many Potential Problems: If you identify many problem areas, concentrate on the ones that show the largest temperature differences. Begin by fixing those. Remember, getting something done is better than getting nothing done!
    3. Additional Troubleshooting Tips:
      • Blurry Images: Ensure there is enough ambient light in the room you are in. Perhaps consider turning on lights in a dark room.